Why an offsite PBS
VM backups can be done to external SMB/CIFS drives directly from Proxmox. I was using an older QNAP NAS for backups but had a few workflow issues I wanted to resolve, namely the full-copy for each backup run presenting two issues:
- a month's backups would consume ~3TB, and
- waking up to hear the backup still running after it's automated midnight start
Proxmox Backup Server (PBS) is a companion service which provides offsite de-duplicated backups for Proxmox VE container and virtual machine images.
The main benefit of running a PBS instance over adding some networked storage to Proxmox is integration and control:
- de-duplicated backups reduce raw disk space over longer timeframes
- especially pronounced for large VM images containing static content
- Chunking means that only deltas are sent,
- Compression on each end makes internet-based backups viable with Australian internet connections
Also, better integration with Proxmox's UI makes managing backups and restoration easier.
With more than two dozen LXC and VM instances running on my main VM machine, I was wanting to get something running soon.
Hardware
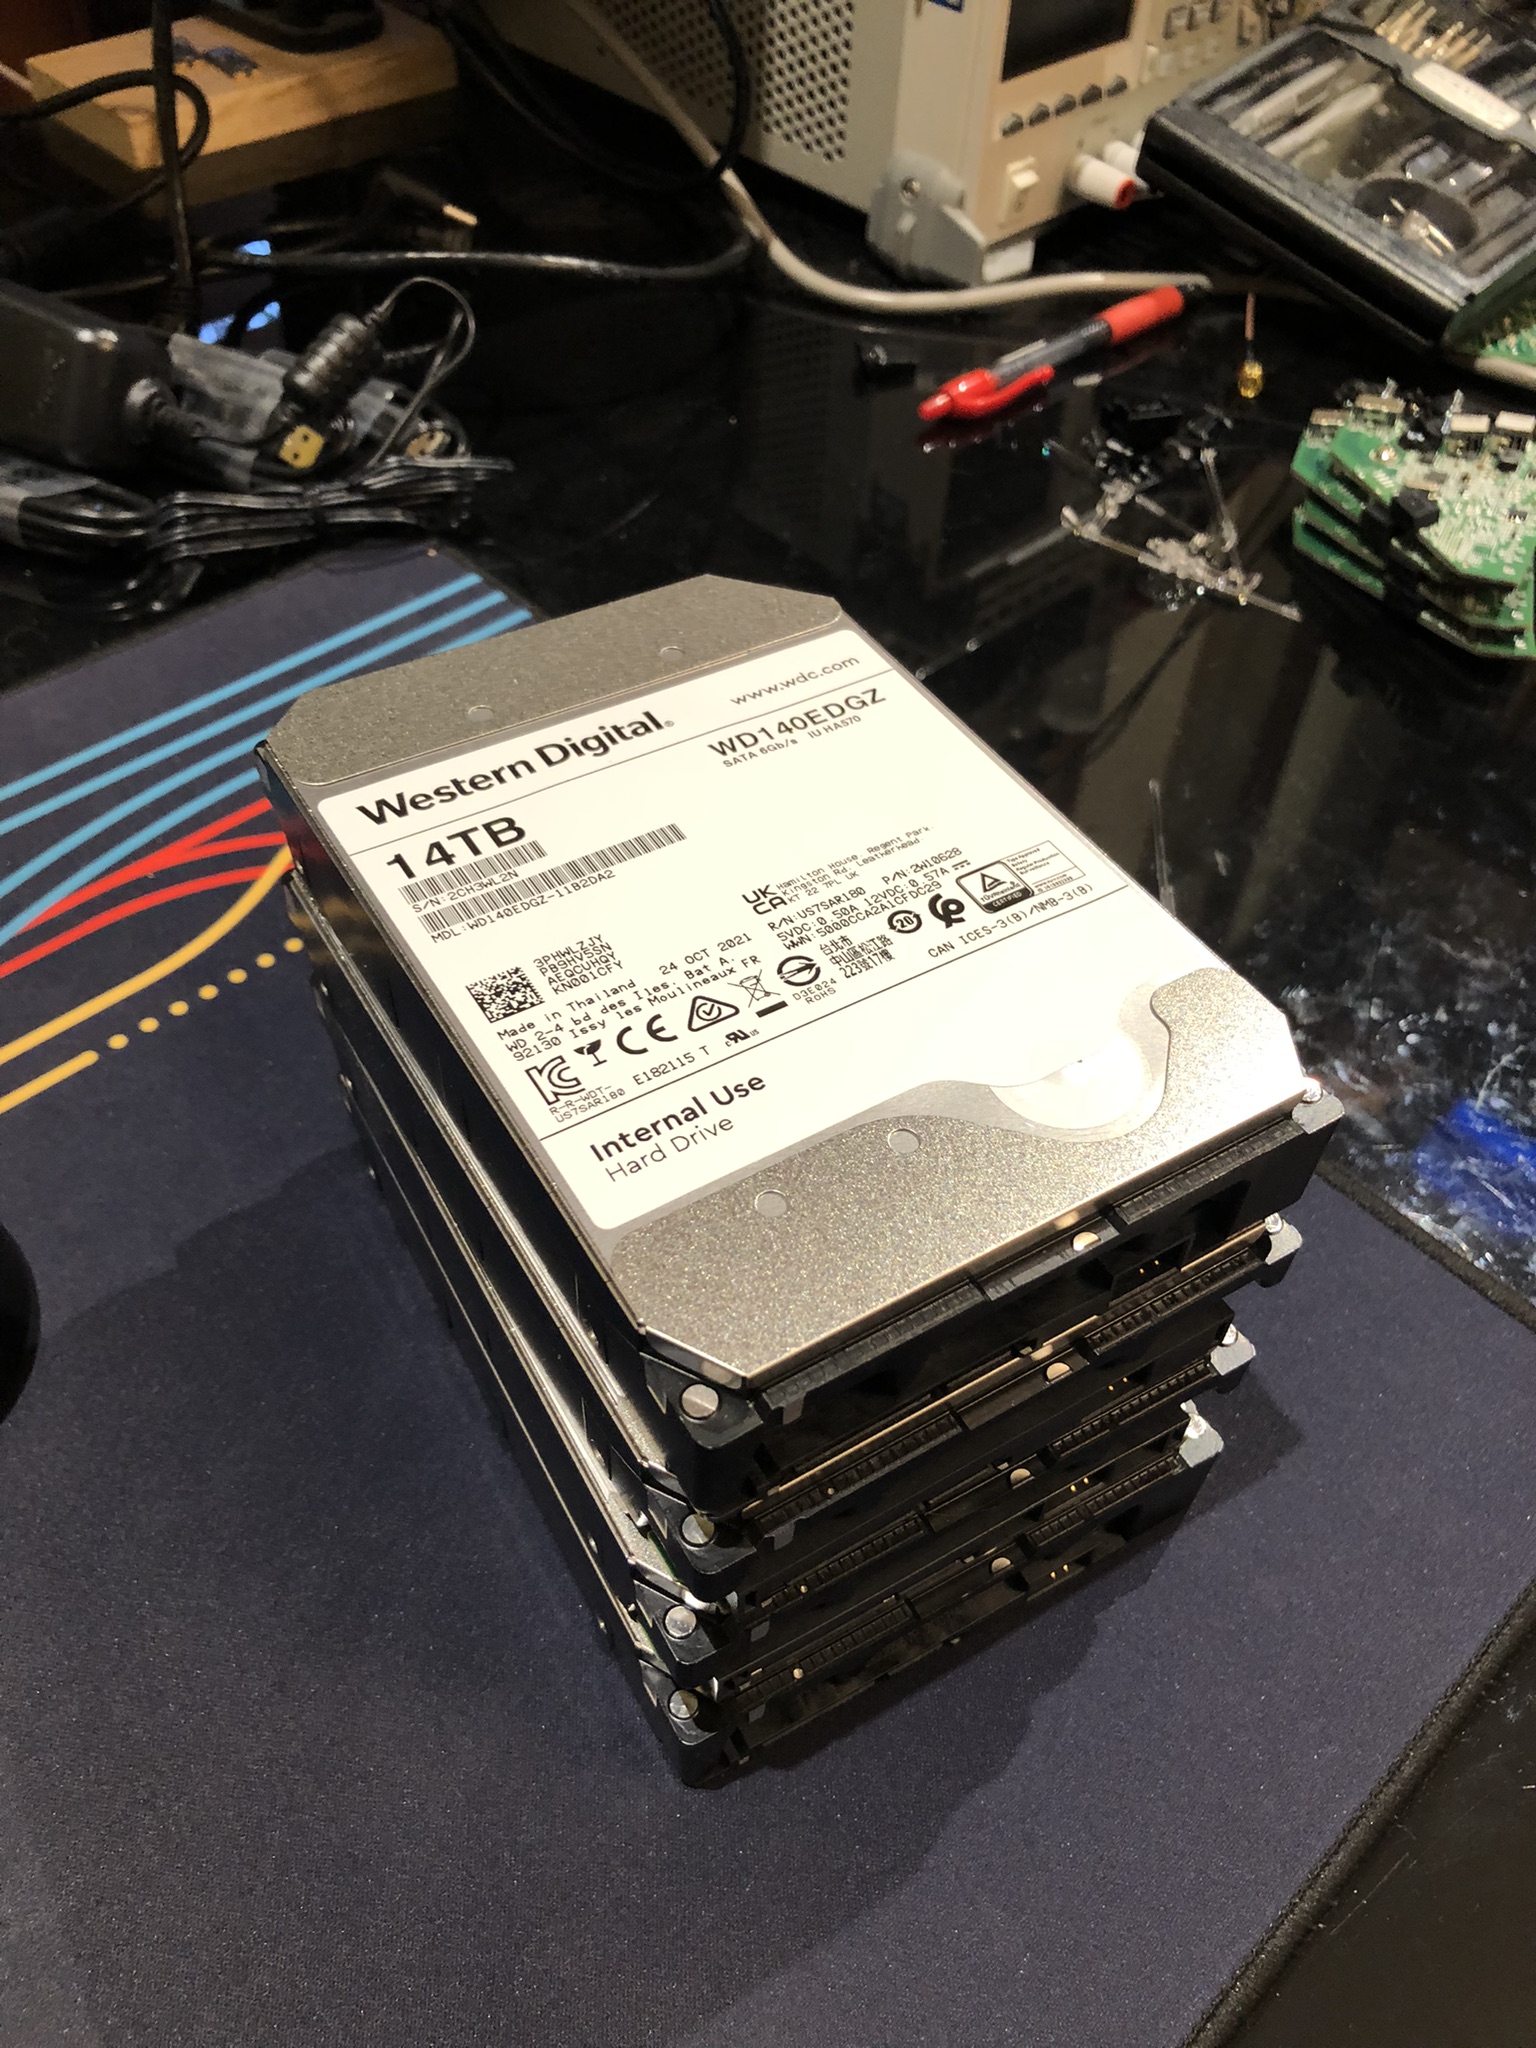
I picked up 4 WD 14TB external drives for a reasonable price - not /r/datahorder bargains, but pretty affordable for Australia's e-retailers.
For a small, reasonably quiet and turnkey server, I picked up a HP Microserver Gen10+ with an Intel Xeon E-2224 and 16GB of RAM.
I used a PCIe to M.2 card for internal storage, and loaded the drives.
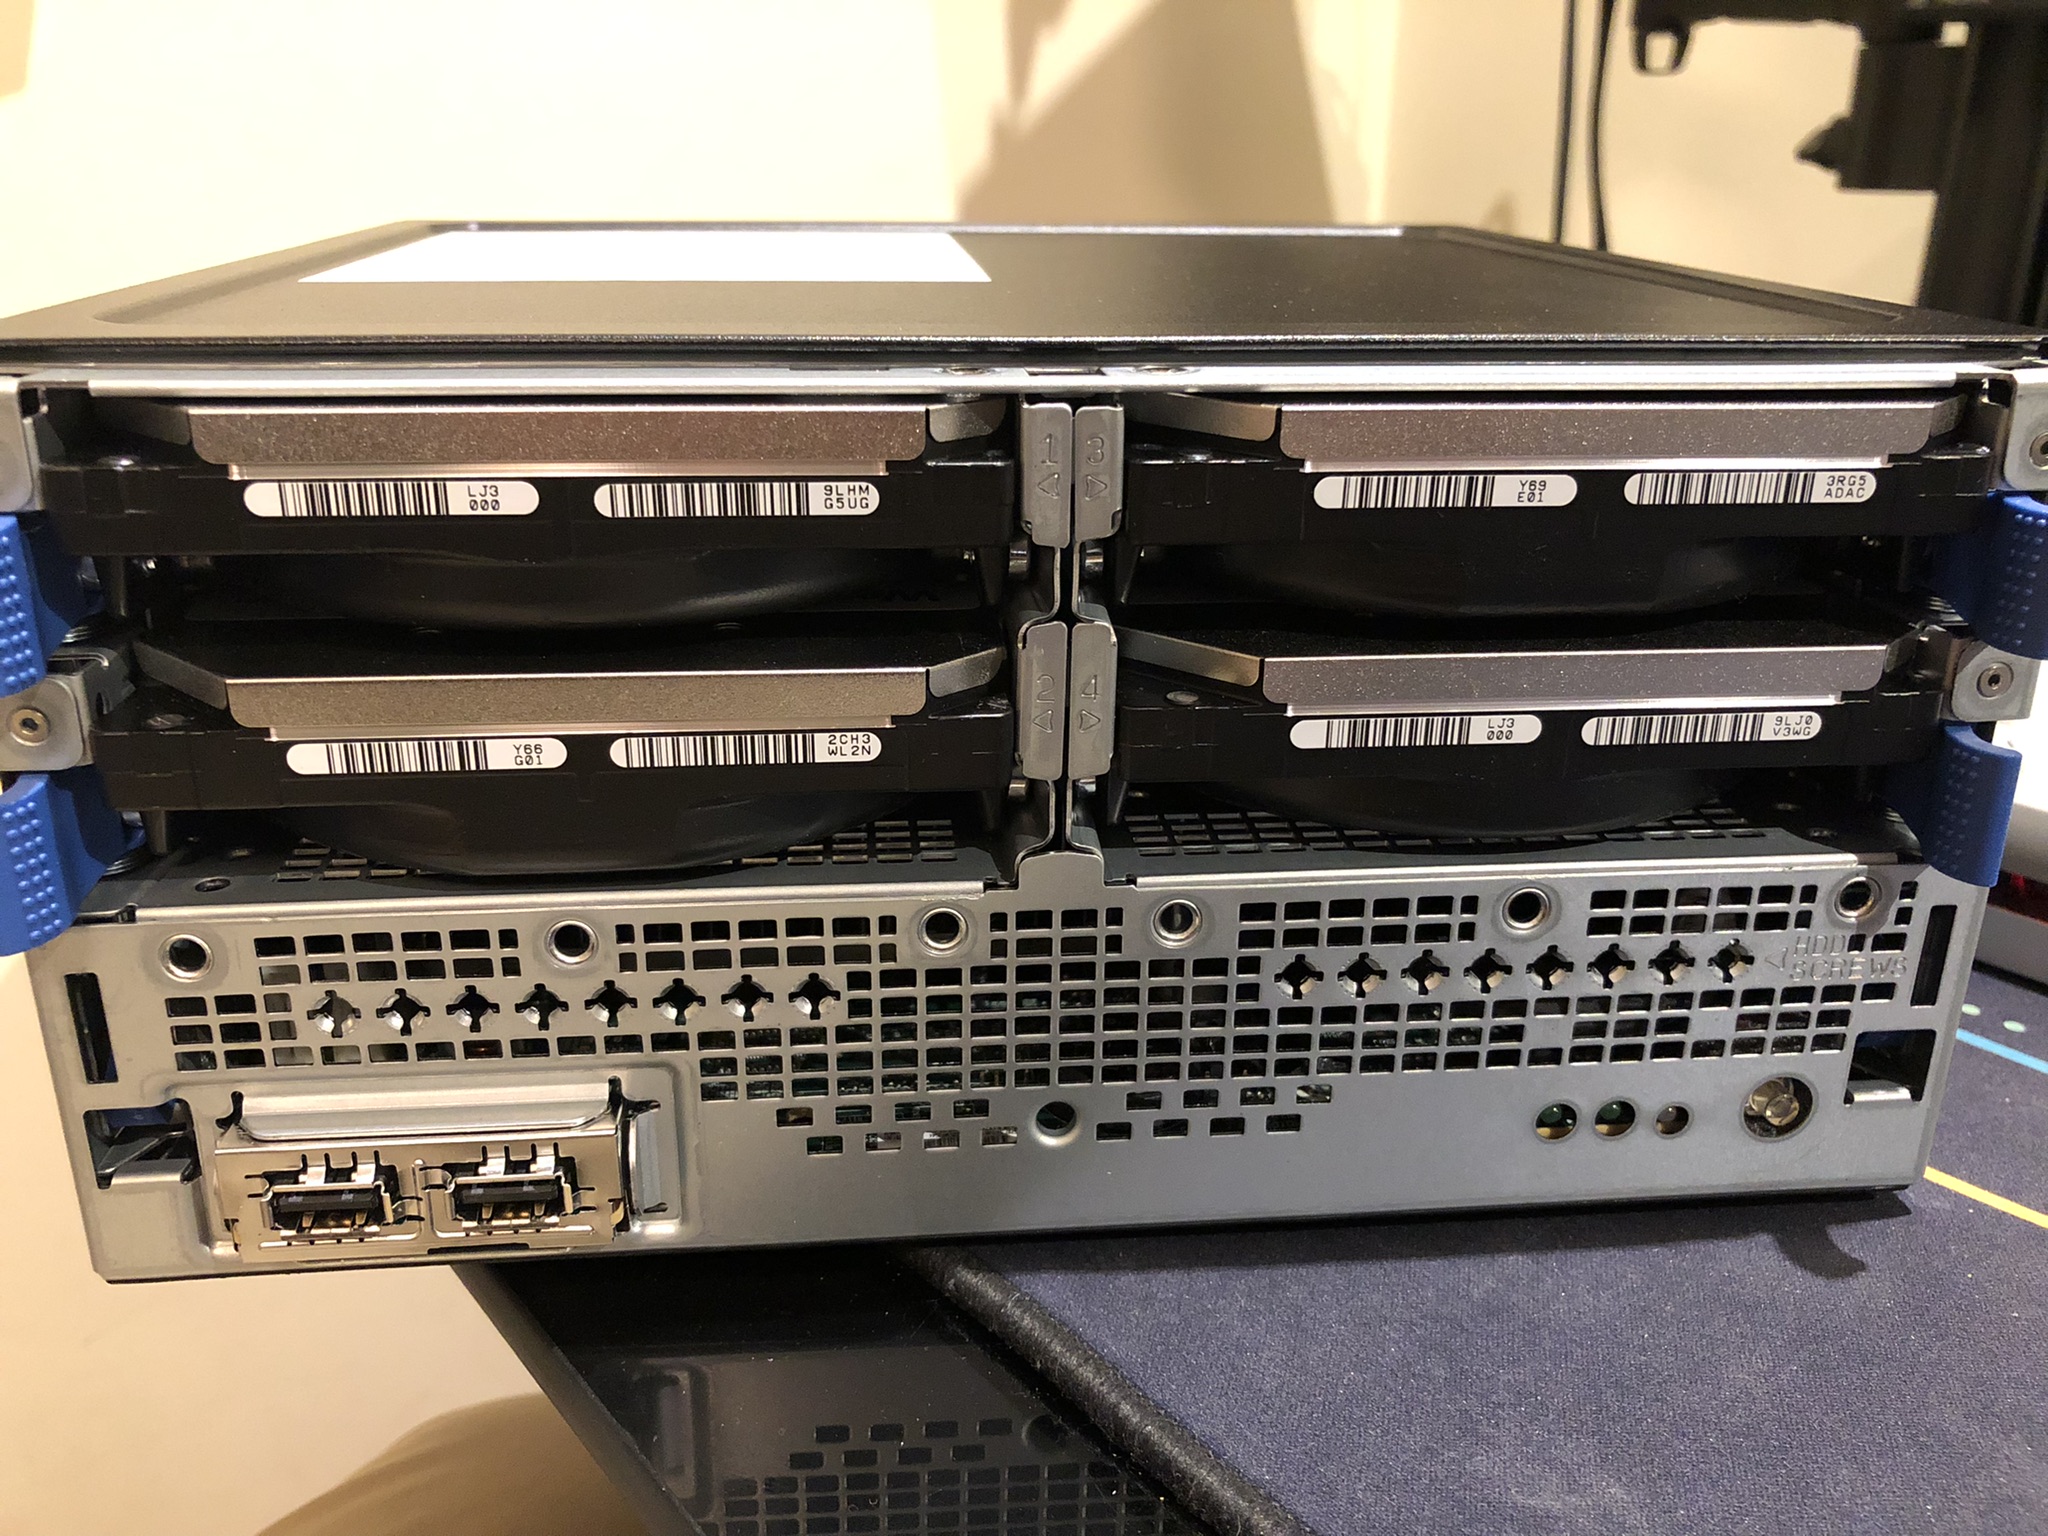
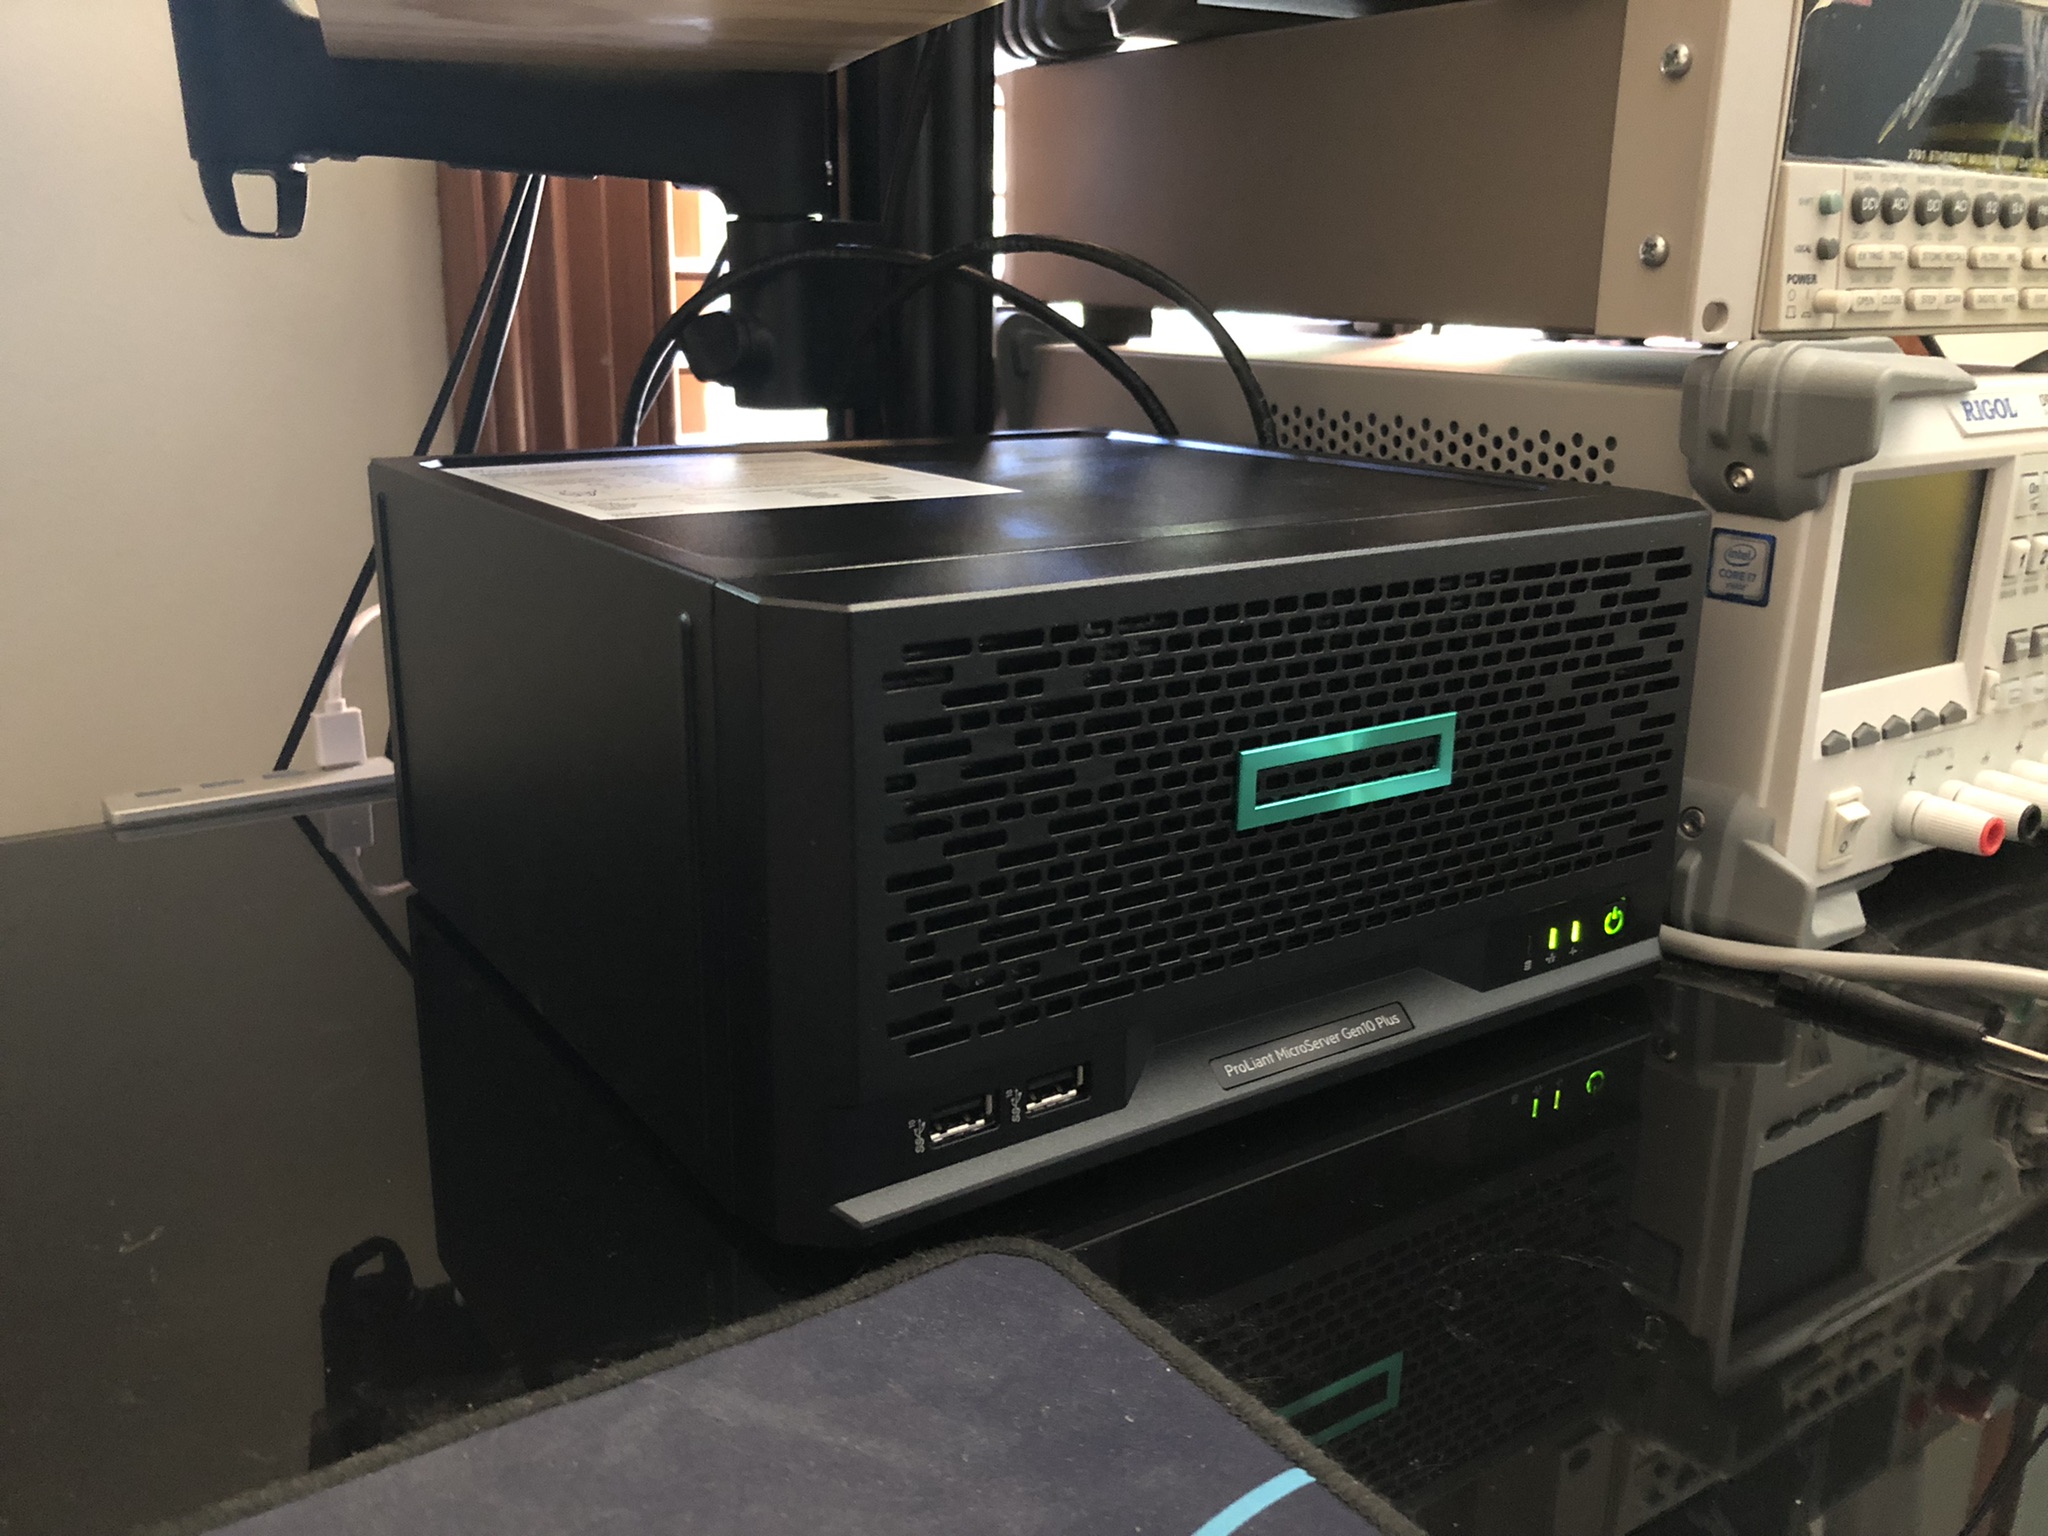
Overall, pretty happy with the compact footprint and build quality of the G10+, though I'd love an internal M.2 slot...
Overcomplicating it
The destination for this backup server is offsite (a friend's house) - so there are some considerations for remote access that force some key software choices, as well as a desire to allow 'multi-tennant' operation where simple VM hosting and storage is allocated for use as a NAS.
Additionally, I wanted to make the unit as close to set and forget as possible - no specific network setup, port-forwarding required. Therefore,
- Solid ZFS support is a must,
- Some kind of virtualisation is needed for multi-user containers
- A site-to-site VPN will be needed to allow the Proxmox VE server and PBS instances to communicate,
- Networks and services should be sufficiently isolated that no access to either 'home' network can leak into any other,
- I need the ability to access Proxmox's management plane remotely,
- and what about remote access to HP's iLO management interface?
I tried TrueNAS at first, motivated by the ability to run the OS from a USB on the internal USB port, and wanting to see what everyone's raving about.
While it's fine, it didn't feel like the correct solution for me, but I can see the appeal of setting ZFS and network shares from a GUI.
Proxmox Setup
Sticking with the tried and true Proxmox for a hypervisor was an easy choice - adding multiple users with pools of containers/VMs solves the multi-tenant requirements reasonably well, and ZFS volumes can be shared to the various containers with bind-mounts.
ZFS Storage
ZFS raidz1 will span the 4*14TB disks, supporting a single disk failure without loss of data, along with the benefits of bitrot detection, compression and CoW benefits...
raidz1 is thought of as a"diagonal parity RAID", where parity blocks are distributed across all disks, with a total quantity of parity equal to one disk.
- The main storage zpool is called
tank. - datasets on
tankprovide segregated storage calleduser1,pbsanduser2. - The internal nvme boot disk also uses single-disk ZFS. Called
rpoolon the host.
Identify the disks,
# ls /dev/disk/by-id

ata-WDC_WD140EDGZ-11_REDACTED_5UG
ata-WDC_WD140EDGZ-11_REDACTED_3WG
ata-WDC_WD140EDGZ-11_REDACTED_L2N
ata-WDC_WD140EDGZ-11_REDACTED_DAC
Create the zfs pool with those disk ID's, and do some minimal config
zpool create -f tank -o ashift=12 raidz1 ata-WDC_x_5UG ata-WDC_x_3WG ata-WDC_x_L2N ata-WDC_..._DAC

zfs set compression=lz4 tank
zfs set atime=off tank
zfs set acltype=posixacl tank
zfs set xattr=sa tank
The idea is to create nested zfs file system datasets for each type or group of data. This helps with isolation, tuning, backups etc.
zfs create tank/user1
zfs create tank/user2
These should be visible inside the default mount points on root, i.e. ls /tank/user1
Additional datasets can be nested using the same path notation. ZFS allows datasets to have different compression/encryption/block size parameters, and I use the deepest dataset level as the 'thing I'd pass to into a container'.
Sharing storage via bind-mount
To make filesharing half sane with various subsystems, create a series of groups on the host.
These groups then have users assigned. These users are also created in the relevant end-user VM or LXC with the same GID:UID properties, allowing for sane permissions management and mapping. This adds a level of control over the downstream user's access to various sections of the storage solution.
i.e. a 'fileserver' LXC user responsible for providing network access via SAMBA/NFS shares the user:group permissions of directories/shares which make sense to expose as shares, whereas a gameserver container would only be provided access and permissions to a specific dataset or subfolder etc.
We manually specify the group ID's on the host to make things a bit easier to track. These are offset by 10000 to account for LXC unprivileged containers. On priv containers those groups can be created as needed.
Use getent group to list the groups and their ID's.
addgroup --gid 101020 storage-user1
addgroup --gid 101030 storage-user2
Use groupdel group_name to delete a group.
To apply the group over a directory, set permissions, and set the access control list:
chgrp -R storage-user1 /tank/user1/
chmod -R 2775 /tank/user1
# Optional if supported (not on the datasets I created this time)
  setfacl -Rm g:storage-user1:rwx,d:g:storage-user1:rwx /tank/user1

chgrp -R storage-user2 /tank/user2/
chmod -R 2775 /tank/user2
When access to storage is needed in a LXC, bind mount setup is pretty straightforward.
From the host's console, navigate to /etc/pve/lxc and edit the 101.conf or file matching the LXC we just made. Add the mount points as required as a new line each:
mp0: /tank/user1,mp=/mnt/user1,size=0Start the container up, and navigating to /mnt should show the bound folder folder. We then need to map the UID and GID between the host and the container to allow consistent file permissions on the mapped directories. On the LXC,
addgroup --gid 1020 storage-user1
usermod -aG storage-user1 root
Log-out and back in so the permissions can take effect. Test access by navigating to /mnt/user1 and create/edit some simple files.
NAS container
Providing access to the file system for non-PBS backups is a partial use-case, so Samba and rsync are needed. I setup a tiny Ubuntu LXC to handle these roles.
Red Hat's Cockpit is a lightweight, reasonably unobtrusive way to monitor and administer linux systems with a web GUI. It's strength is the design philosophy of using standard Linux services/config files, and only runs while a socket is made to the server.
Ubuntu instructions are here, but as a quick reference:
apt install cockpit curlIt will run on port 9090 and uses the container's Linux account credentials system for login.
45drives maintain some cockpit plugins to make identity and samba management easier.
45drives/cockpit-identities and 45Drives/cockpit-file-sharing need to be installed.
curl -sSL https://repo.45drives.com/setup | sudo bash
apt update
apt install -y cockpit-identities cockpit-file-sharing cockpit-navigator
For optional Windows/network discover-ability, install wsdd from Ubuntu's package manager directly.
apt install wsddSamba share setup is reasonably standard at this point (i.e. frustrating to get perfect).
Network Setup
Isolation by design
At home, I segregate end-user devices from servers and management interfaces with VLANs, but I was keen to avoid a similar approach on the remote site to separate the 'backup DMZ' from the local network.
The plan is reasonably intuitive:
- Assign a second network adaptor to act as my 'backup DMZ'
- Setup a site-to-site VPN with Wireguard to connect the remote and home networks.
- Allow traffic flow across the Wireguard bridge,
- Setup a static route on my local network to allow me to access the remote DMZ network as if it were local.
Because the Microserver has 4 gigabit ethernet ports in addition to the management interface, I can also connect directly to the 'isolated' network if I have hardware access. This would also make a lot of sense in a multi-wan environment.
I'm aware this might be considered sub-optimal from a best-practices standpoint, but I'm happy enough with the level of security for a homelab use-case.
Talescale is an alternative option that can provide machine-to-machine connections without the same network bridging.
Site-to-site VPN
To remotely access the backup server and it's network, I run a Wireguard container which automatically attempts to connect to the Wireguard instance running on my VM host at home.
Because the connection is outbound only (aka a road-warrior), I don't need to configure port-forwarding on the remote network, and it's a controlled single point of contact between my 'backup DMZ' and the local network it's squatting in.
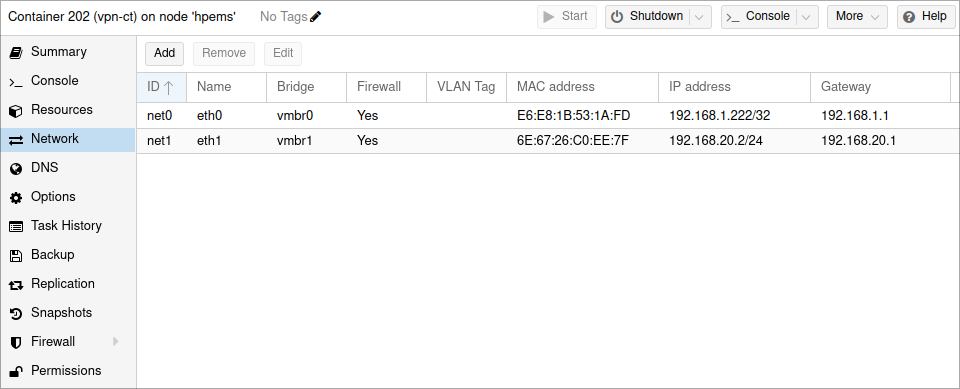
In Proxmox's network page, I created an additional Linux bridge which was attached to the second ethernet adaptor, and assigned it 192.168.20.1/24.
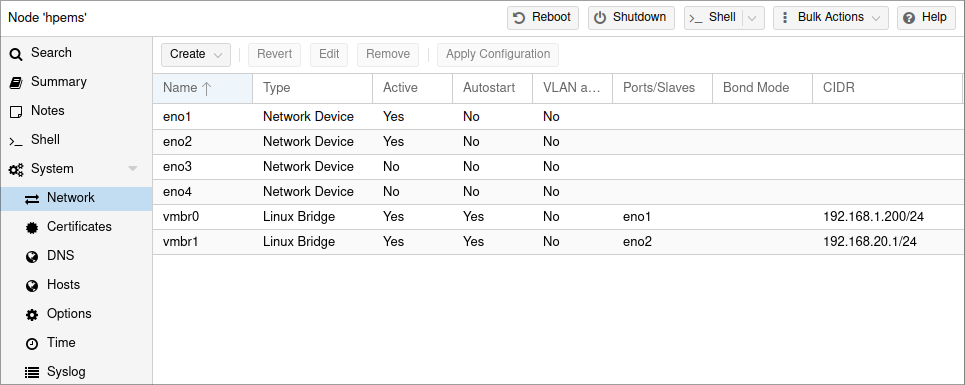
This vmbr1 interface is intended to act as the only network interface to my containers. Due to the 'no remote network configuration' requirement, I did need to provide both interfaces to the Wireguard container for internet access.
By adding the adaptor in this manner, Proxmox makes it's management interface available at 192.168.20.1, which is useful if connecting via hardware on eno2, and will be useful later when we want to access Proxmox over our bridge.
First, we'll add another client to the existing onsite Wireguard container to allow remote access,
### begin hpems-offsite ###
[Peer]
PublicKey = Gredacted=
PresharedKey = EredactedA=
AllowedIPs = 10.6.0.8/32, 192.168.20.1/24
PersistentKeepalive = 25
### end hpems-offsite ###
Then start preparing the offsite container.
Offsite setup
A simple Debian LXC container was spun up, and both Proxmox virtual bridges were added to it's network configuration.
Once wireguard was installed, the /etc/wireguard/wg0.conf configuration looks something like this:
[Interface]
PrivateKey = Gredacted2=
Address = 10.6.0.8/24
MTU = 1200
DNS = 192.168.1.1, 9.9.9.9

PostUp = iptables -A FORWARD -i wg0 -j ACCEPT
PostUp = iptables -t nat -A POSTROUTING -o eth0 -j MASQUERADE
PostUp = iptables -t nat -A POSTROUTING -o eth1 -j MASQUERADE

# Push two packets across the tunnel after opening it
PostUp = ping -c2 192.168.1.154

PostDown = iptables -D FORWARD -i wg0 -j ACCEPT
PostDown = iptables -t nat -D POSTROUTING -o eth0 -j MASQUERADE
PostDown = iptables -t nat -D POSTROUTING -o eth1 -j MASQUERADE

[Peer]
PublicKey = EredactedK=
PresharedKey = FredactedA=
Endpoint = redacted.duckdns.org:51820
AllowedIPs = 10.6.0.8/24, 0.0.0.0/0
PersistentKeepAlive=15
The interface and peer are reasonably normal, but we've got a few extra bits of iptables network configuration in the PostUp and section which allow NAT traversal between the eth0 and eth1 interfaces.
Additionally, once the link is up, we ping the onsite VPN container to ensure some traffic is flowing over the VPN. The PostDown sections provide cleanup of the PostUp changes.
We also need to edit /etc/sysctl.conf and uncomment net.ipv4.ip_forward=1 to allow IPv4 forwarding across the container's networks. Activate the change with sysctl -p.
Enable the VPN with wg-quick up wg0 and wg-quick down wg0 as typical. Also remember to open the wireguard link at startup.
sudo systemctl enable [email protected]
sudo systemctl daemon-reload
I originally had
wg-quickfail with/usr/bin/wg-quick: line 32: resolvconf: command not found. This was resolved by providing systemd's resolver. I did this via symlink,ln -s /usr/bin/resolvectl /usr/local/bin/resolvconf
Onsite Setup
We'll also need to make sure traffic can be forwarded across the VPN,
# Masquerade rules
PostUp = iptables -A FORWARD -i %i -j ACCEPT; iptables -A FORWARD -o %i -j ACCEPT; iptables -t nat -A POSTROUTING -o eth0 -j MASQUERADE
PostDown = iptables -D FORWARD -i %i -j ACCEPT; iptables -D FORWARD -o %i -j ACCEPT; iptables -t nat -D POSTROUTING -o eth0 -j MASQUERADE
On my home network, I setup a static route on my Unifi USG router to allow traffic flow between my local Wireguard container's IP and the subnet used on the bridge network backing the remote DMZ (192.168.20.0/24)
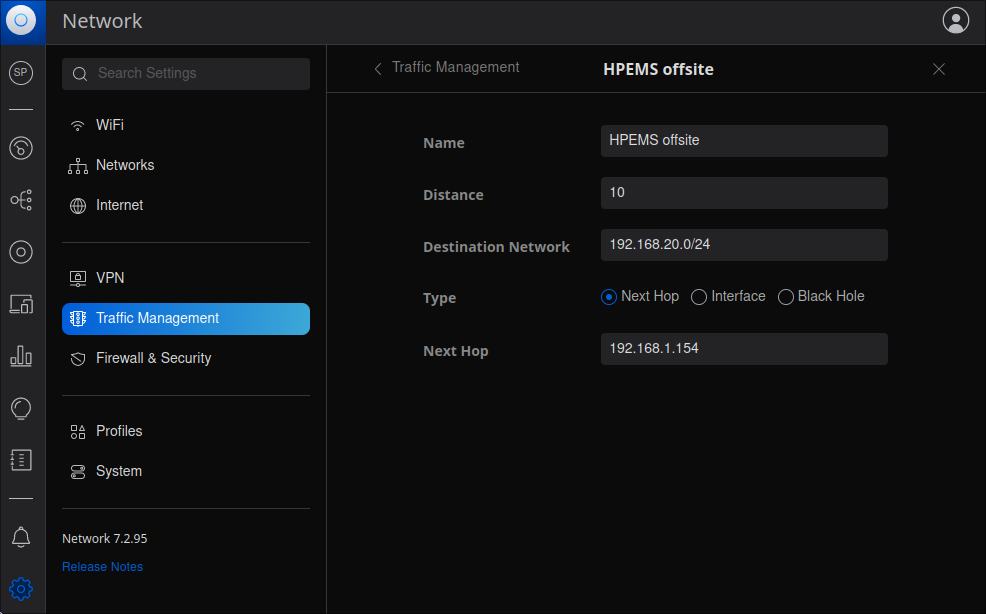
This means that traffic attempting to access IP addresses in the remote DMZ subnet will be routed to the onsite Wireguard container.
We can see this redirection in action by running a traceroute between my workstation on the local network and a container on the remote DMZ,
scott@octagonal ~ $ traceroute 192.168.20.2
traceroute to 192.168.20.2 (192.168.20.2), 64 hops max
  1   192.168.1.1  0.410ms  0.327ms  0.331ms
  2   192.168.1.154  0.843ms  0.403ms  0.392ms
  3   192.168.20.2  9.962ms  8.651ms  9.945ms
We can also access the remote Proxmox management interface by browsing to https://192.168.20.1:8006.
Accessing the internet in remote DMZ containers
Because the remote machine has a separate but bridged network for all of my services, they don't have direct access to the local internet (by design).
Additionally, because there's no software router running on the 192.168.20.1/24 subnet, the remote containers need to be told how to access the 'onsite' 192.168.1.1 resources via the bridge available at 192.168.20.2.
For ubuntu:
ip route add 192.168.1.0/24 via 192.168.20.2 dev eth0For debian:
ip route add 192.168.1.0/24 via 192.168.20.2 dev eth0 onlinkThis does have the minor downside that internet traffic on these remote containers is taking a pretty indirect route to the internet, but it's only really for software updates.
PBS
The setup of PBS in an LXC was fast and easy, so I won't go into too much depth,
- Provisioned a Debian container with 2 cores and 256MB of RAM
- Installed PBS installed via the official channels.
- Setup a bind-mount for a ZFS volume, and configured a datastore at the path in
/mnt/pbs - Get the PBS fingerprint from the dashboard, and use it to add a new storage volume to the Proxmox VE machine pointing at the container's IP.
- Configure backup frequency and rules,
- On the PBS webpage, setup prune and verification jobs to run periodically on the datastore.
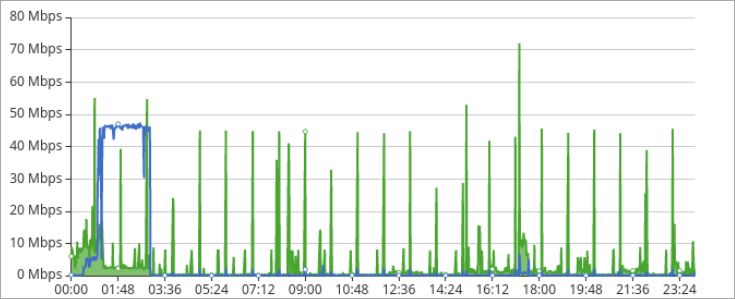
The first backup ran overnight as the HP microserver only has a gigabit link, but since then I've been running remote backups every Monday, Wednesday and Saturday starting at 12:30am.
With my 50Mbps upload speed, the incremental backups normally take an hour or two to send the ~40GB deltas.
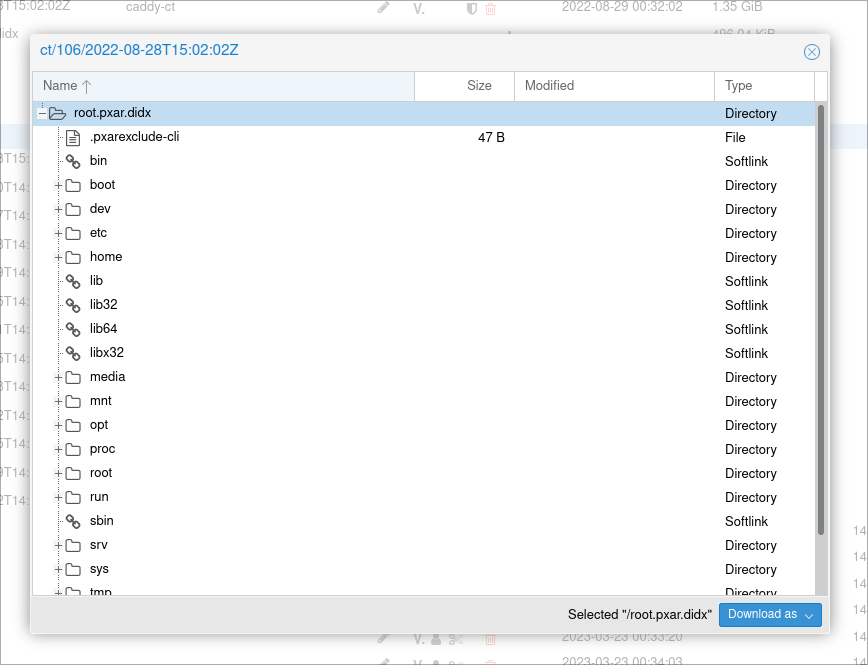
The PBS interface is reasonably well laid out, allowing visibility of the various containers/VM's and the different snapshots.
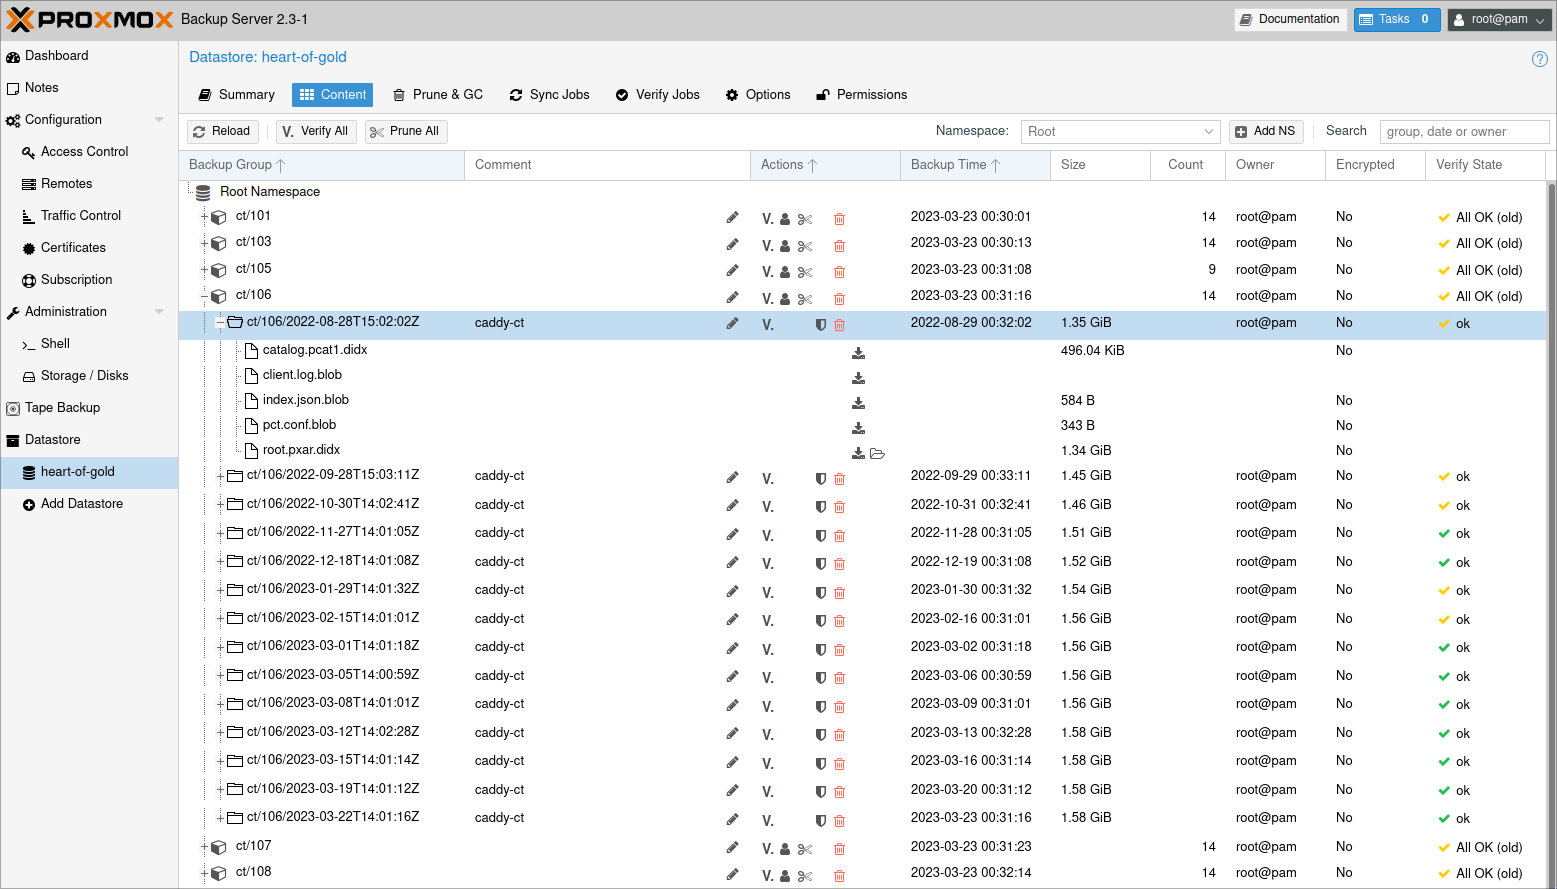
One neat benefit is the ability to introspect a LXC container's file system from the web interface, which might be useful to cherrypick a specific file instead of running a full restoration of that container.
Closing thoughts
Whilst not the cheapest or most practical for all home-labs, I've got a far greater level of comfort by both improving the backup experience for Proxmox, as well as adding offsite file storage.
The setup of a full-time bridged remote network was a first for me, and I can't say enough good things about the stability of the system and functionality available with modern open-source options.
Update: More than a year later everything is still going strong. I wouldn't have changed my approach, other than setting up ZFS send/recv for backing up my other files with snapshot support, instead of relying on rsync.
I've restored a few containers without issue, and average a de-duplication factor of about 12.